How To Improve Poor Call Quality on MS Teams Across the Enterprise with Nexthink
Microsoft Teams is one of the most widely used collaboration tools today. Entire enterprises rely on MS Teams for cross-functional communication, project management, and productivity. If Teams has issues, entire projects can get derailed, and business objectives could be at risk. This places pressure on IT teams to proactively measure and manage the performance of MS Teams, to ensure issues don’t prohibit employee productivity. The ability to monitor poor call quality on MS Teams and identify the cause can improve user productivity, and proactively help in ticket reduction.
In this article, we’ll explore how to improve MS teams poor call quality by leveraging the additional telemetry provided by Nexthink Collaboration Experience through:
- Nexthink Real-time Alerting to monitor and alert.
- Nexthink Live Dashboards for additional insights into call quality.
- Nexthink Device View to highlight the correlation between MS Teams Sessions and device activity.
Check out how we improve MS Team’s Poor Call Quality with Nexthink in action.
Nexthink Real-time Alerting
Nexthink Real-Time Alerting helps the IT teams proactively see and diagnose poor call quality on MS Teams before the issue begins negatively affecting employees across the enterprise.
Let’s look at how to improve MS Team’s Poor Call Quality with Nexthink Real-time Alerting.
Step 1: Navigate to the Alerts and Diagnostics tab and click on Alerts Overview.
Here you can see that we have an alert for the business application Microsoft teams showing high alert.
Step 2: Click on the drop down to see the details of the alert related to the business application Microsoft teams – bad call quality by city
Step 3: Here, the displayed result shows Boston, click on the options and select Investigate more.
Step 4: Click on any of the devices to look at the Device View and investigate. The Device View will show you a timeline of all activity on the selected device.
Step 5: Hover over the Microsoft Teams calls under the Activity section to see the call details. Here, you can see the WIFI is bad, and that this is the reason for the bad call quality of Microsoft Teams calls.
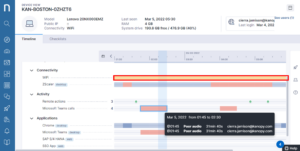
Step 6: Click on the call to view the additional details.
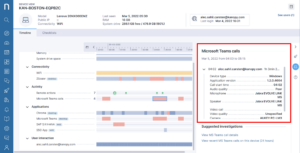
Step 7: You can drill down and investigate further by clicking on View MS Teams call details for an in-depth analysis of the calls.
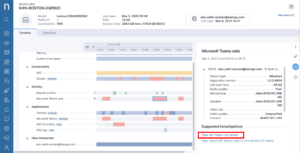
The telemetry data available on the below session screen gives information related to audio call quality jitter and RTT as well as additional telemetry to help uncover the reasons for the bad call quality.
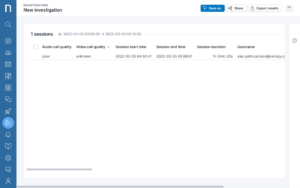
We can see the cause for the MS Teams poor call quality is WIFI. For more context, we’ll look at a Live Dashboard.
Nexthink Live Dashboards
We can use the Nexthink Live Dashboard, and specifically the Device View functionality to gain additional insights into the poor call quality by drilling down to an individual user’s device to check for correlation between MS Teams Sessions and other errors, crashes, or other issues that may have taken place on the device at the same time.
Let’s explore how Nexthink Live Dashboards help to diagnose the call quality issues.
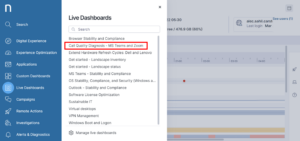
Step 1: Navigate to the Live Dashboards and click on Call Quality Diagnosis – MS Teams and Zoom
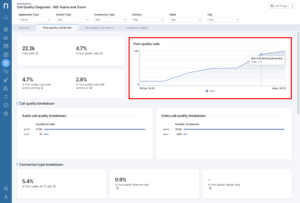
Step 2: Select the application Teams. The summary screen displays the summary of all the calls, allowing you to easily identify the peak in the bad quality calls.
Step 3: In the poor call quality metrics dashboard, you can see that WIFI is the issue for Microsoft teams bad call quality.
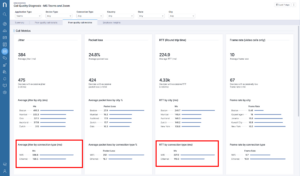
With both Nexthink Real-Time Alerting and Live Dashboards we were able to see and diagnose that WIFI is the issue.
Nexthink Campaign as a Fix
Depending on the analysis of an issue there may be different solutions, such as remote actions, self-help campaigns, or others. Since we are dealing with a WIFI issue here, where it requires user action to fix, we will use a Nexthink Employee Engagement Campaign to attempt to fix the issue.
We will now trigger a campaign to all the affected users to help fix the issue. The solution is to ask the users to use their ethernet cable to connect to the internet and improve their Microsoft Teams experience.
Let’s now see how we trigger the campaign to all the users impacted by poor call quality due to WIFI.
Step 1: Click on the Employee Insights tab to see the user details of all employees affected by poor call quality.
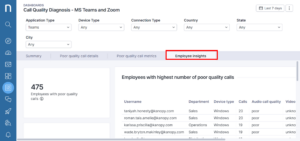
Step 2: Navigate to the employees with poor quality calls and open as an investigation.
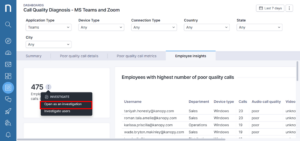
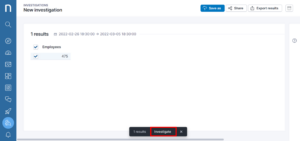
Step 3: Select the devices you want to communicate with and click Investigate.
Step 4: Click on the object Users to see the list of users for whom you will be launching a campaign.
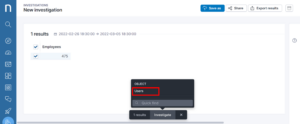
Step 5: Select all the users and click on Launch Campaign
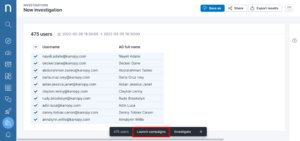
Step 6: Select the campaign Issues with Wi-Fi – Teams and click Send.
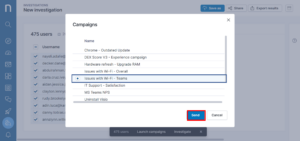
This immediately sends a simple pop up campaign to all users affected by poor teams quality, asking them to switch to an ethernet cable to remove call issues.
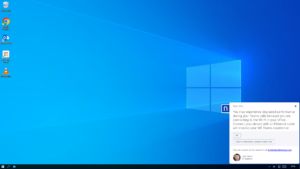
And that’s it! With both Nexthink Real Time Alerting and Nexthink Live Dashboards we were able to see and diagnose the Microsoft Teams bad call quality issue. Using a Nexthink Employee Engagement Campaign we were then able to fix the issue.
Ready to learn how Nexthink could help your team find and fix issues faster? Request a demo today
